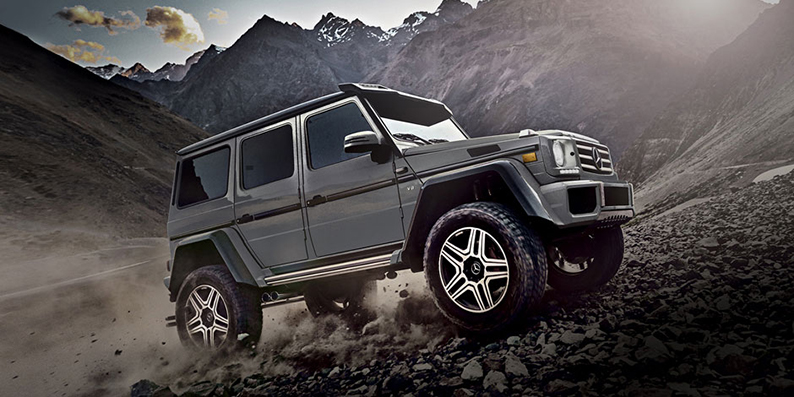
Fourth & final chapter of our tutorial series dedicated to off-road driving. It is now time to have fun and learn the basic skills of driving.
Table of contents
Introduction
Now that we have gone over the importance of a thorough preparation, the best vehicle options available to you, and cover the list of essential things you need to bring along for a safe trip, let’s dive more specifically in what your 4×4 can do for you, how safety must always be on your mind, and how to correctly tackle the various terrains, weather conditions and obstacles, you’ll be confronted with in the field.
What a 4×4 can do for you ?
My intention isn’t to give you a mechanical class and explain how the various parts of your car work together. All of which would take a very large book, one I still advise you strongly to find and read. Instead, I will try to show you how to use two major specific components that allow you to drive virtually everywhere; the vehicle’s transfer case and its tires.
Transfer Case.
What’s a transfer case ?
As stated on Wikipedia:
“A transfer case is a part of the drivetrain of four-wheel-drive, all-wheel-drive, and other multiple powered axle vehicles. The transfer case transfers power from the transmission to the front and rear axles by means of drive shafts. It also synchronizes the difference between the rotation of the front and rear wheels, and may contain one or more sets of low range gears for off-road use.”
If that is Chinese to you, it’s time to go learn more about the drivetrain and how it all works for a 4×4. For that I suggest you go read this following detailed article once you’re done here.
For the purpose of this beginners tutorial let’s just see how to use it.
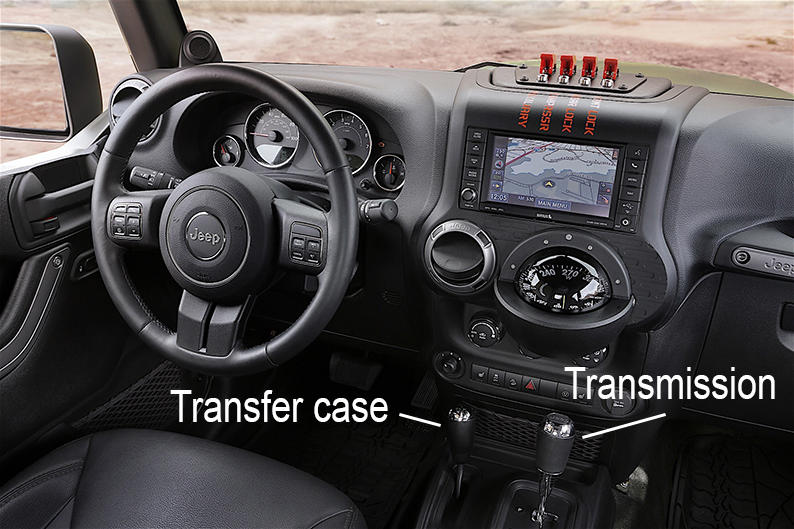
Traditionally, the transfer case is engaged through a smaller separate shifter sitting next to the main transmission shifter. Nowadays, with the rise of electronics, brands and models are coming each day with new and more “sophisticated” ways to engage the system, and can sometimes offer more options you can think of or really need. Regardless of what you have in your car, the good old shifter or a gameboy like console, the basic concept applies the same to all.
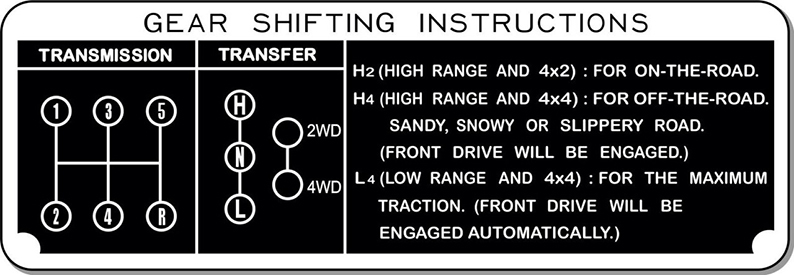
Your transfer case is used to engage both front and back axles in unison, turning in the process your car into 4×4 mode. It also allows you to decide which gear ratio, “High” or “Low” you might want to use depending on the power need you have.
High range.
The “High” range engages both front and back axles on the standard gear ratio. The same one as when driving in two-wheel-drive. You are now in four-wheel-drive mode, all wheels pulling, but still using your gears the same way you would if you only had two wheels engaged. This is the range you will use most of the time.
Low range.
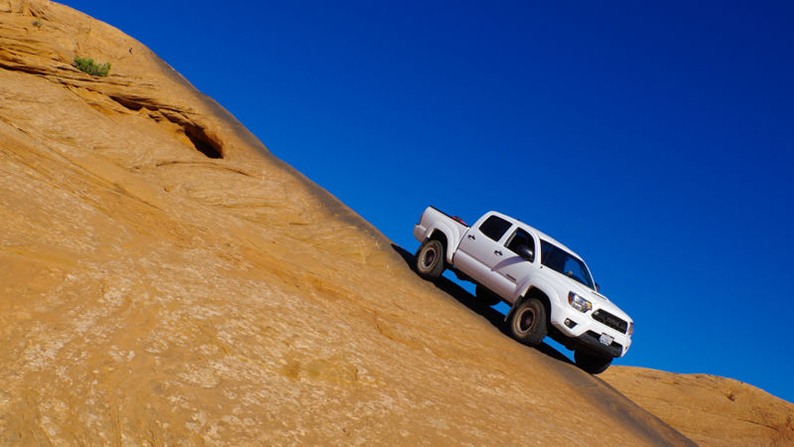
The second option, called the “Low” range, engages the transmission in a much lower gear ratio, as such multiplying the torque of your vehicle. The Low ratio is being used for extreme situations only, like a very steep (but straight) descent, passing complicated obstacles, or getting out of a stuck.
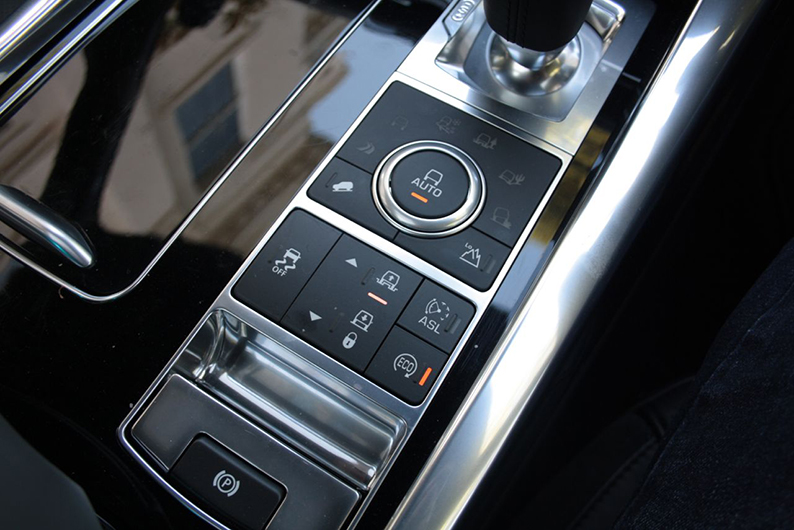
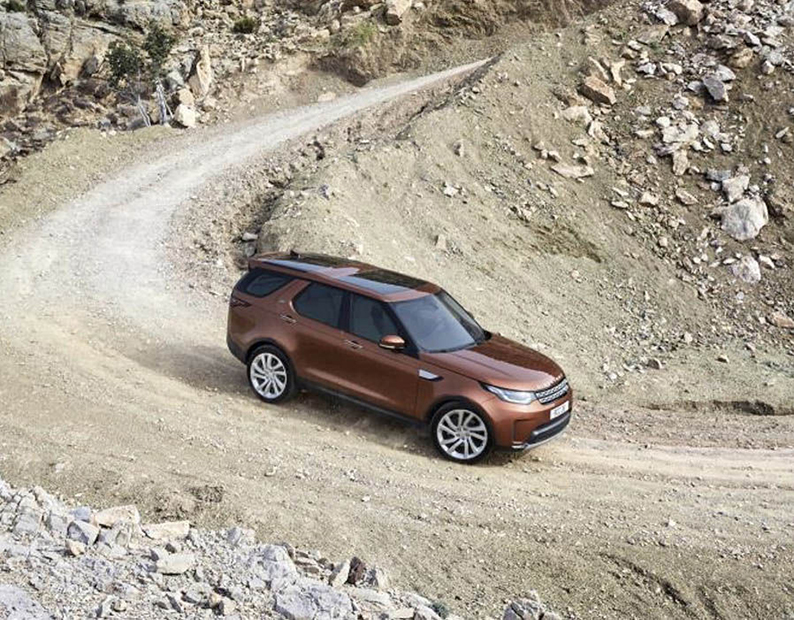
For those of you driving Range Rovers for example, a knob on the central console will offer a lot more options, depending on the type of terrain you’re on. Instead of just High or Low, you’ll be faced with choices like sand, snow, slope angle, etc… It may look fancy by being more specific, but in the end your ECU is just choosing between High or Low for the same end result !
Restrictions.
Now, to be fair, your car is so good, you can stay in normal 2-wheel-drive most of the time. Get to “High” range when you might need a little push, and consider “Low” when in serious trouble. No point engaging 4-wheel-drive mode immediately after leaving the tarmac. It not only spikes up your fuel consumption, it also effects your turning capacities.
What do I mean by that ?
You can’t turn when in 4-wheel-drive mode ! Try to force it, and it will break in costly fashion ! Again it’s all a matter of geometry. Your front wheels do not turn on the same rotation axle as your back wheels. You’ll notice it if you do a 360° in snow, or on the beach while in 2-wheel-drive. You have separate circles of different sizes drawn on the ground. However when in 4-wheel-drive, your car’s axles are now linked together. As such they must follow the same path ! We have a problem don’t we ? How can I turn then ?
The solution, loose ground. Being on loose ground allows your wheels to spin, and as such rotate at different speeds, which compensate the turning diameter differences.
Let me give you a specific example. You are climbing on a mountain trail. It is so steep, and the ground is so dusty, you need to engage in 4-Wheel-drive to move forward. You get in High range, first gear, and slowly start to climb till the first sharp turn. The trail surface is made of loose dirt. You feel your wheels spinning more or less as you take the turn. All is fine. The next curve is no longer made of dirt. It has been covered with tarmac to fight water erosion. Your wheels won’t spin loose on that. You must stop your car, get off 4-wheel-drive back to normal to take that turn.
Now what comes up, must come down. You are coming down and it is so steep you can’t rely on your brakes alone. You need to engage in 4-Wheel-drive Low range and let the engine do the work. Only now there is no way you can take a sharp turn regardless of the trail surface. Your wheel are not going to spin during the turn. You must stop before the curve, return to 2-Wheel-drive and take the turn while playing with your brakes. Once the turn is done, re-engage the Low range.
Locking differentials.
The other great thing about a 4×4, is the ability to lock a wheel at a time when it’s spinning free. It’s called locking the differential, or most commonly known as engaging the diff lock. Now, not all 4×4 have that option available, and you can survive without it, but it’s always nice if you have it when you need it ! I could try to go through the mechanics of it, but instead will just quote Wikipedia again which has a pretty good definition already.
“A locking differential, differential lock, diff lock or locker is a variation on the standard automotive differential. A locking differential may provide increased traction compared to a standard, or “open” differential by restricting each of the two wheels on an axle to the same rotational speed without regard to available traction or differences in resistance seen at each wheel.
A locking differential is designed to overcome the chief limitation of a standard open differential by essentially “locking” both wheels on an axle together as if on a common shaft. This forces both wheels to turn in unison, regardless of the traction (or lack thereof) available to either wheel individually.
When the differential is unlocked (open differential), it allows each wheel to rotate at different speeds (such as when negotiating a turn), thus avoiding tire scuffing. An open (or unlocked) differential always provides the same torque (rotational force) to each of the two wheels, on that axle. So although the wheels can rotate at different speeds, they apply the same rotational force, even if one is entirely stationary, and the other spinning. (Equal torque, unequal rotational speed).
By contrast, a locked differential forces both left and right wheels on the same axle to rotate at the same speed under nearly all circumstances, without regard to tractional differences seen at either wheel. Therefore, each wheel can apply as much rotational force as the traction under it will allow, and the torques on each side-shaft will be unequal. (Unequal torque, equal rotational speeds). Exceptions apply to automatic lockers, discussed below.
A locked differential can provide a significant traction advantage over an open differential, but only when the traction under each wheel differs significantly.”
Let me illustrate this with an example. Imagine you are parked on a beach. On the right side of your car the sand is very soft. On the left side the sand is hard enough for you to drive away just fine. The problem is that because the soft sand on the left side offers no resistance, your left wheels are spinning with no grip, while the right wheels are sitting still not even moving. As a result you’re digging until you are finally stuck. The only way to avoid that is with a diff lock. When engaging the system, you are forcing the wheels on the right side of the car to engage, despite the fact the opposite wheels are spinning free. You now have the ability to drive away.
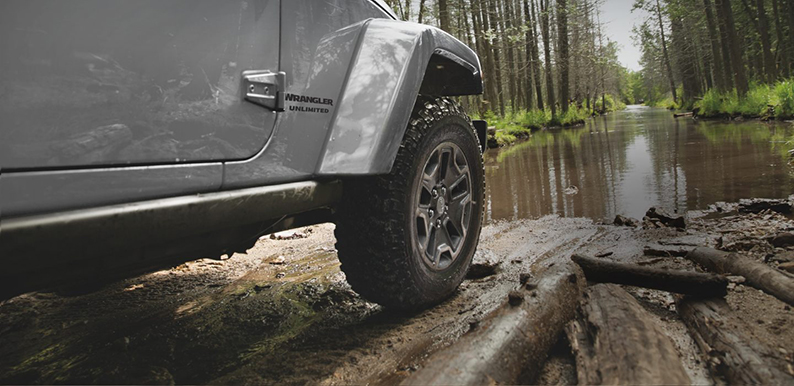
Understand your tires.
All the power your car can produce internally, is of no use unless your tires can transfer it efficiently to the ground. If you’re not “grabbing” the surface to pull forward, you’re only spinning free, or worst, digging a hole to get stranded in. 4×4 tires, starting with the all-terrain range, are designed to offer the best grip possible on “all-terrain”. Yet, they need to adapt that gripping surface depending on how firm or loose that surface is. That is why you need to fluctuate the air pressure inside. More air on even, firm surface, like 35 psi on tarmac. Lesser the amount of air on looser ground surfaces, like 15 psi on sand.
Tire pressure – How does it work ?
Get your air compressor out, or if you don’t have one yet, go to the nearest gas station. Fill up your tire till the manufactured recommended pressure for road driving. For a normal sized off-road tire it should be close to 32/35 psi. Now look at the bottom of your tire and see the size of the surface of contact between your tire and the ground. Your tire being close to a full circle it is at a minimum. As a result a very small amount of rubber is actually pulling forward on the road. It may be more than enough on tarmac, it isn’t on less sturdy grounds. Now proceed to deflate that same tire to 15 psi and look again. The tire is no longer a near perfect circle. It’s sitting more flat on the ground. This means a bigger/longer grabbing surface and as such, more pull. Add to the mix that being deflated the gap between each thread is now wider, and you have gained even more help for the job ahead.
While you’re at it look at your tires from the front. You’ll notice a small pear shape bump on each side near the bottom where the tire sits. As you can see, the tires didn’t get a wider contact zone, but the softer side of your tires, also called the wall, is no longer standing perpendicular to the surface, but instead sitting more exposed to side projections. The lower you go, the more exposed you are, the greater the risk of side punctures. That explains why you can go much lower in sand than in rocky mountain areas. Sand won’t harm you side tires, sharp rocks definitively will. You need to find the right balance between grip and puncture exposure when deciding on how much you should deflate.
I will go over the various air ratios for each particular type of surface in the dedicated following sections.
Safety first
Finding the right sitting position.
Time to get inside your car and try to find the perfect driving position. First and foremost, you need to sit comfortably. Find a position that won’t put stress on your back, and allow you to sustain the beating of the uneven track for many long hours to come.
Now obviously there is more to it, otherwise we wouldn’t bother writing about it.
What also matters when driving on uneven surfaces, is your ability to clearly see what lays directly ahead of you, in order to place your wheels away from obstacles. Because of simple triangular geometrical reasons, the higher you seat, the better angle of vision you’ll get. Raise your seat to where you can reach your tallest position and bring it forward closer to the steering wheel.
The way you hold on to your steering wheel also matters. Keep your thumbs on the outside. A “wheel Kick” can happen anytime and break those misplaced thumbs in a heartbeat.
Be loose, no point holding on that wheel for dear life. It’s all a question of balance. Too loose and you’re letting your wheels and therefor the terrain do the driving. Too stiff and you’re over-fighting the terrain, putting too much stress on your direction.
Where is it safe to drive ?
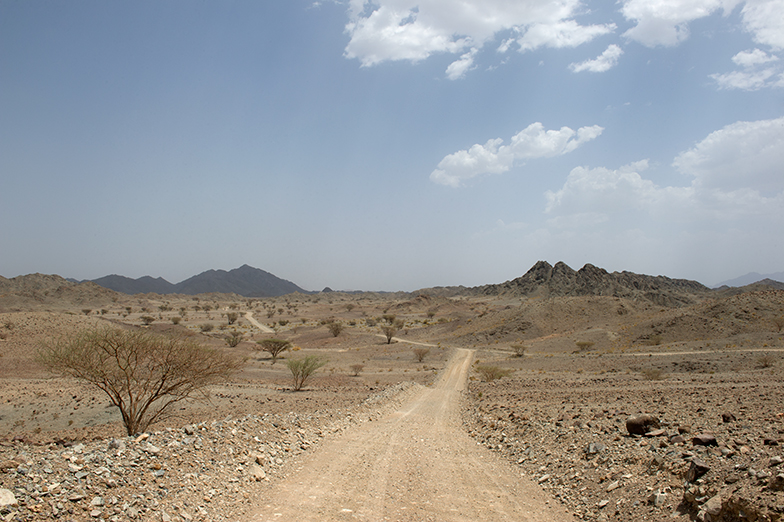
It maybe called off-road, it doesn’t mean you should venture away from any tracks. (Desert driving is the exception) Try to stay on visible tracks as much as you can, no matter how faint or tricky they may be.
It easier not to get lost that way, and rescue teams, if needed, have a better chance to come help without further delays. Also because wilderness can turn suddenly very hazardous and often leaves very little room for safe improvisation.
For example, a common mistake is, when taking a wrong path, to decide to “cut through” to get back on the right one, instead of safely going backwards to the point where you took the wrong turn. What seemed like a short cut is 9 times out of ten a recipe for disaster.
Stay on the safest way !
How fast should I go ?
“As slow as possible, as fast as necessary”
I don’t think you can put any better way than this !
Take your time to appreciate your environment, observe the obstacles around you, and plan the right way to go around them. At the same time have enough speed, or momentum to carry yourself through any situation.
How to approach an obstacle safely ?
Take your time and take a good look at any obstacle before moving forward. Stepping out of the car for a better survey of the situation is often the best way to go. That can mean climbing all the way to the top of a Dune to see what is behind, or climb a hill to see if the trail is really worth the attempt to the top, or crossing a river on foot before engaging your car. It may seems like a waste of time at first, but it’s always quicker than getting stranded and fighting for hours to get out of a mess !
Driving at night.
I hate it, and strongly advise against it!
Two reasons:
First, no matter how many lights you install on your car, you still can’t see clearly what lays ahead, as you would during day time. And we have already emphasized enough the importance of having a good vision of your environment.
Second, you’re in the wild. Animals are a lot more busy at night than during the day. Most road kills happen at night. You can’t see them until you’re too close, they can’t escape because your lights, especially if you went overboard with the led bars, are blinding them.
Find a camp site before it gets dark, settle down and enjoy the stars above… A much better way to spend the evening that lost somewhere trying to figure out to get back to safety !
Solo driving or Group ?
Solo.
I love it ! But it ain’t the safe way to go. I love it because I manage my own time and can stop for ever, waiting for the right light exposure when taking a picture. I love it because I don’t have to worry about anyone else. But when in trouble, I’m on my own. No one is here to help or save my day. Do not go out alone until you have enough experience. Experience means, being able to get out of a mess alone.
How do you know if you can ? Try first to rescue yourself while others look around in case you can’t manage. Also know how to help others. Once you’ve proven yourself you can do both with calm in a safely manner, then and only then, you can start going solo.
Group.
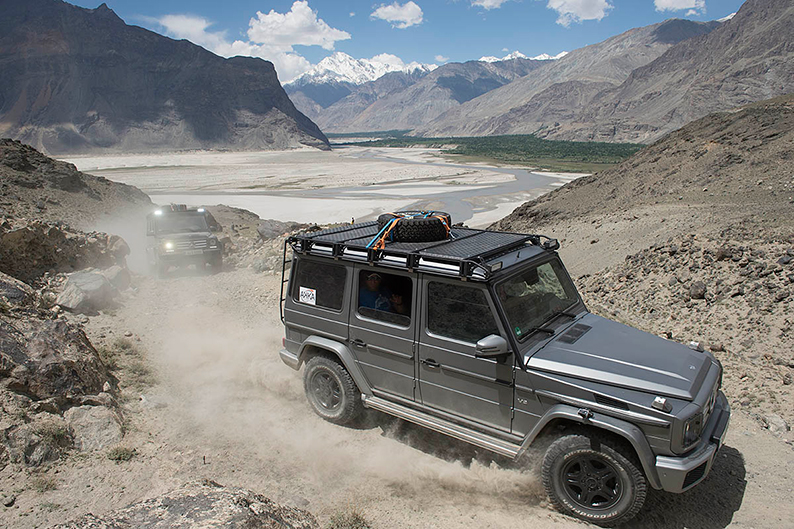
A group is almost always a safer way to enjoy off-roading or any other adventurous endeavor. But it requires more organization and more discipline than going away on your own.
When planning a group “expedition”, there is a lot more at stake than just getting along. Being good friends is a start, but it is not enough. Everybody must bring an expertise to the team. Being responsible and in charge of a needed skill. May it be driving, navigation, mechanic, cooking, language, etc… A group of several drivers, where nobody knows how to fix a flat tire, understands a map, doesn’t speak a word of a foreign language or ever started a fire, is not a team but a moving traffic jam looking for trouble.
A team needs a leader, with experience, authority and a good dose of psychology to keep everybody safe and happy. That leader will open the road and guide others according to everyone’s potential. It also needs a second “in charge” sweeping at the back of the convoy, helping those in trouble.
When going with a group make sure to find one that fits your goals and your needs. If you want to build your own group, make sure you build a qualified team around you and try it on a few short trips before making your decision. (Kinda like dating in a way !)
Rescue tools & procedures.
No matter how hard we try to avoid troubles, troubles will ultimately find you. As they say, “it ain’t an adventure until something goes wrong”. Be prepared. Have the necessary tools with you (Our last post details all you need to carry with you while on the trail), know how to use them before you need them, and practice with others the various rescue procedures.
By rescue we mostly mean, getting out of a stuck. (For medical rescue procedures, take a specialized class teaching open field medicine) In such situation, most people directly think about pull ropes or winches. But, as we are about to illustrate, there are various softer steps to consider before reaching to that point. Remember that pulling out a 2 tuns truck out of a stuck with a violent pull from another vehicle can put a lot of stress on the frames. Better not abuse it !
First get out of the car to analyze the situation. (You should do it before it’s too late, when there is still a chance to get out of trouble with your driving skills.) But for the sake of argument, we’ll consider you’re stuck for good, and go over the various tools and procedures you can use to get out.
The first three below mentioned – the shovel, the Maxtrax and Jack – are what I like to call the soft options. They should pull you out of most situations. However, when stuck in a large area of soft ground, where you won’t be able to gain enough momentum to drive out without getting stuck again – soft sands, heavy mud, etc… – or sitting at a very risky angle – like in a deep trench or on the side of a steep dune flank – you will have to consider being pulled out. For that you’ll need either a pull rope or a winch, as we will explain in details below.
Shovel.
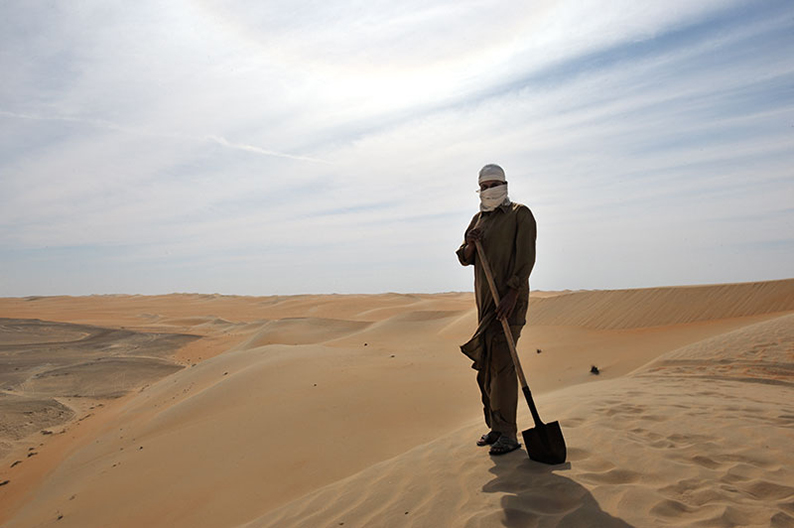
The first tool is your best friend the shovel. It’s amazing what a simple tool like the shovel can do for you. Look at the wheels in the most troubled position and clear around them as much as you can. Have a shovel with a long and strong handle, so you can dig under the car as well, and clear where it “lays”. It’s often the underframe of the vehicle touching the ground once the wheels have dug deep enough holes, that prevents you from moving.
Once dirt is cleared out of the way, get back in the car, engage in “Low” range, first gear, and gently press on the gas so your wheels don’t spin and dig again. (if driving a manual, get your foot off the clutch immediately. It’s by leaving the clutch engaged partially during those maneuvers that you burn the plate, and ultimately find yourself stranded in the middle of nowhere! The burning smell, isn’t your tires getting hot, it’s your clutch begging for mercy!) Either it worked or you need to move on to our next tool.
Maxtrax.
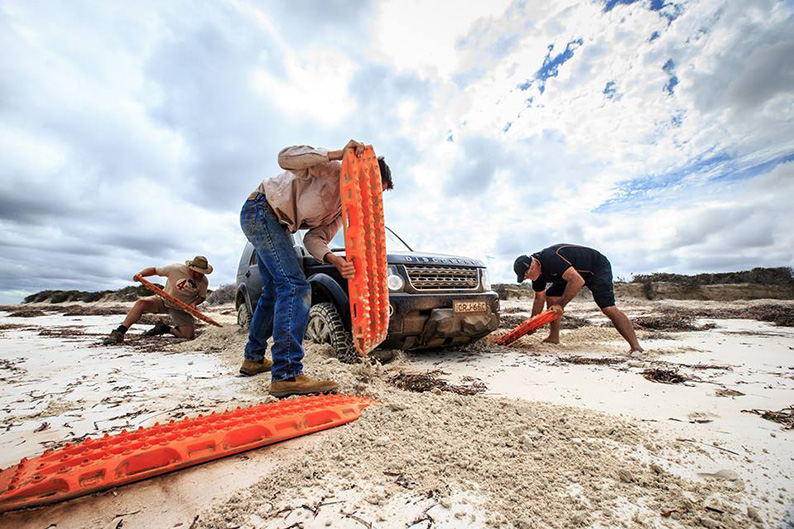
The second handy tool is a set of Maxtrax or lambda traction boards if you don’t want to use (or pay for !) the most popular and trusted brand name. Once you have cleared the sand, mud, snow, gravels or whatever else was blocking you, carefully place your traction boards in front or behind your wheels, depending which direction you choose to get out.
Get back in the car, engage in “Low” range, first gear, and gently press on the gas so your wheels don’t spin and dig again. (Spinning your wheels on a Maxtrax will burn flat the small plastic sticks on the board intended to give you grip. It happens very fast and is a good way to ruin for good an otherwise very expensive piece of equipment). Either it worked or you need to move on to our next tool.
Jack & stand.
The third tool to carry along is a jack and a large piece of wood for it to rest upon. (Very important safety concern here. An unstable jack is a sure way to get in serious trouble. Nothing worse than a car falling back on you as you dig around the wheels, because the jack wasn’t on sturdy grounds)
If the shovel and the boards weren’t enough to get you out of trouble, raise the car with your jack and put whatever you need under your wheel to get more traction – Rocks, wood logs, or simply better positioned boards.
Get back in the car, engage in “Low” range, first gear, and gently press on the gas so your wheels don’t spin and dig again. If you still can’t get out as you should have… It’s time to pull either with a rope or a winch !
Pull rope.
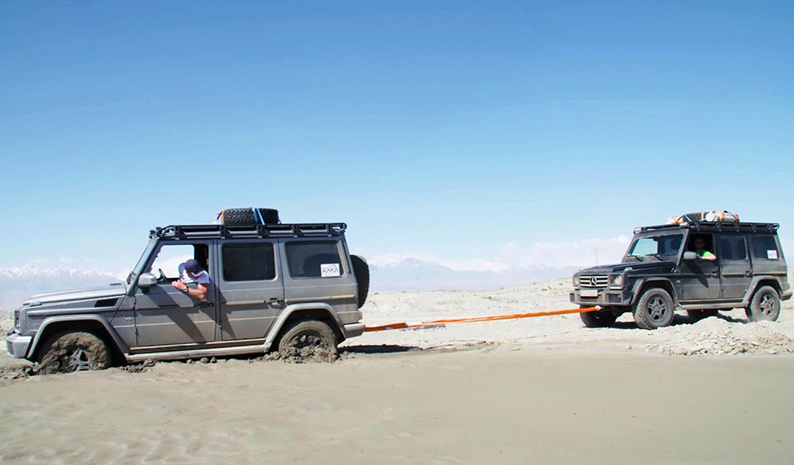
First option, (That option obviously can only work if you’re in a group and have an extra car to pull you out. Because if out on your own, don’t have a winch as last resort, and all the previous options have failed so far, then my friend, Houston has a problem !) get your pull rope out and attached it first to your car, then to the car pulling you out.
Have a rope and hooks that can sustain the weight and force required to pull your car. A rope or the fixing hooks giving way can kill you. That is why I recommend using hooks made out of ropes instead of metal. In case it breaks, you won’t get a metal piece of hardware bursting back at you like a bullet. Also make sure the car pulling you out is not putting itself at risk to get stuck in the process. Sounds silly, but happens so often it is worth mentioning. Choose a sturdy enough ground to have good traction, and an easy escape in case it starts digging.
Once all is properly set, (agree to a signal or communicate through walky-talkies), get yourself in Low range, first gear and push on the gas pedal ever so lightly, so your wheels begins to turn slightly. At that time the other car starts the motion and with its momentum and force pulls you out. There is a right way to do this without violently pulling on the frame. It’s called being gentle, you’ll get it with experience.
Winch.
The concept is exactly the same with a winch only smoother, and if you have the winch yourself, you can even pull yourself out without necessarily the help of another car. For a full and complete guide to winching, read this tutorial on how to use a winch.
Terrains, driving conditions & obstacles
Driving off-road in Oman has very little to do with driving in Finland during winter, or Borneo during raining season. Terrains, weather conditions and obstacles vary greatly over the world. They also demand different driving techniques to handle correctly. All of which makes it such an exciting adventure.
In the following paragraphs we will review the major driving conditions you might be faced with.
Let’s not pretend we can cover everything here with just a few words. Simply hope the following basics and pointed tips will help you start and safely learn more on your own.
Let’s get to it !
Sand.
Sand driving is an art form !
Tires.
There are special sand tires available. But they are very fragile and don’t last long on any other surface. Don’t bother.
As explained above, you must lower your tire pressure for better traction. The standard tire pressure sits at 15 psi. If driving on softer sand, 12 and even as low as 10 psi will provide extra grip.
Range selection.
You can drive in the sand in 2-wheel-drive under certain circumstances. Hard sand beaches, major desert trails in valleys between aligned dunes, don’t require 4-wheel-drive. Remember that four-wheeling as a steep impact on your fuel consumption. Saving fuel should always be a concern of yours.
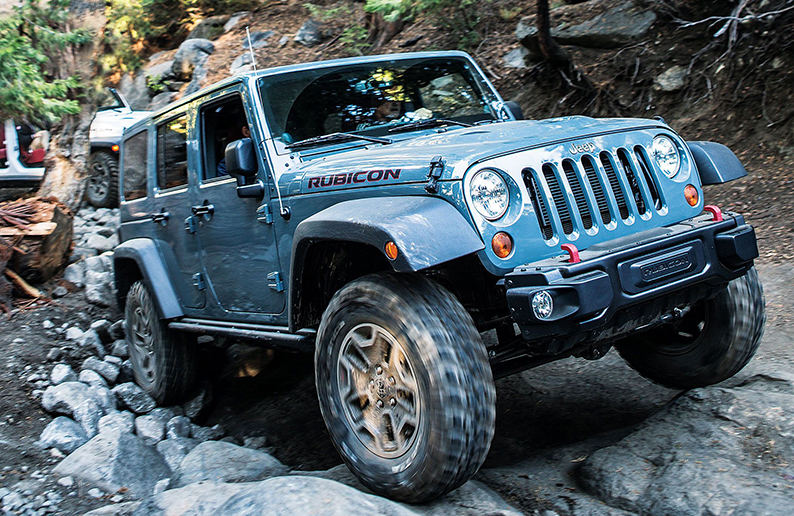
(A quick example: My 2012 4 doors Wrangler JK Diesel, as an average fuel ratio of 9-10 L/100 km on tarmac. It reaches 11-13 L/100km on sand in 2-Wheel-drive. It can jump to 20-25 L/100 km in High range 4-wheel-drive, depending on the softness of the sand. I don’t want to know what it would be in Low range !)
As such, engage in High range when necessary. Only reach for Low range to get out of a stuck.
Driving techniques.
Anticipate, anticipate, anticipate !
You must drive with enough speed to “float” on sand.
Know where to stop, so you can leave again from that spot. Try to find a spot looking downwards. It’s always easier to start with your weight playing for you. The other way around, trying to start going up is much harder if not impossible. Avoid stopping on soft sand or where others have previously stopped and messed up the surface.
Don’t break hard or you’ll burry yourself. (You hardly need to break anyway, the sand does that for you very very efficiently)
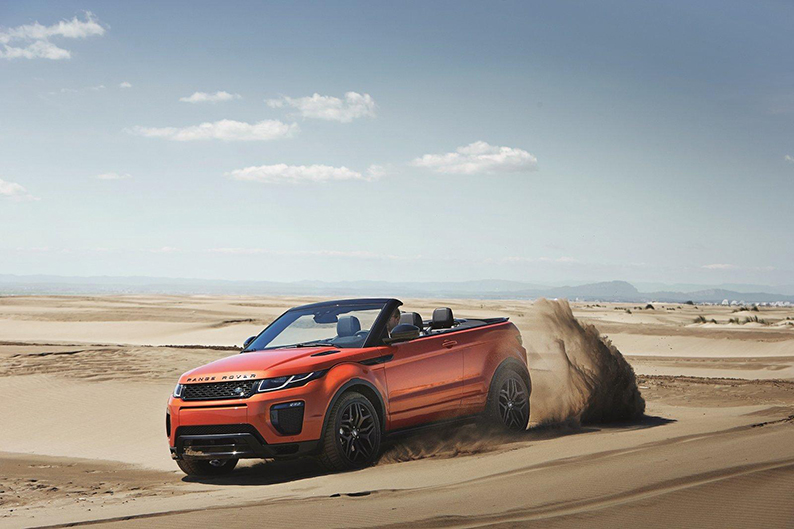
Beach.
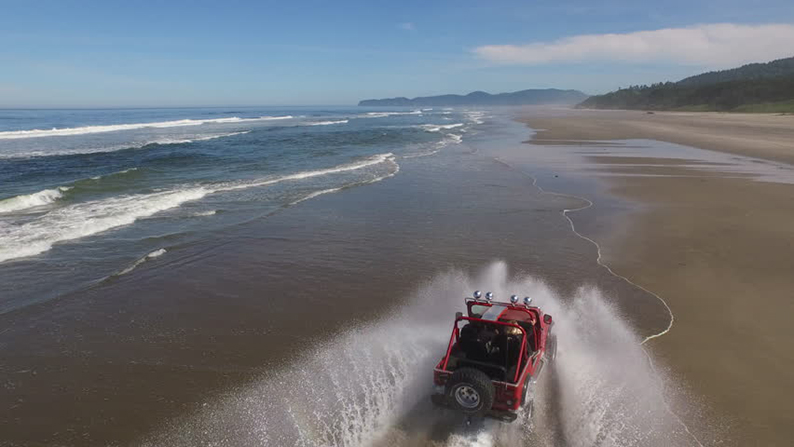
Driving on a sand beach is easy. Just lower your tires to 15 psi. You’ll only need to engage in 4-wheel-drive High if the sand is soft. End of the story.
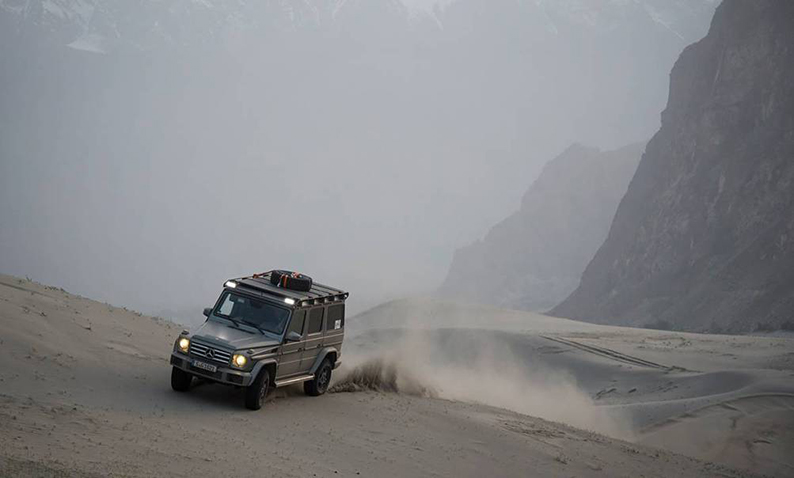
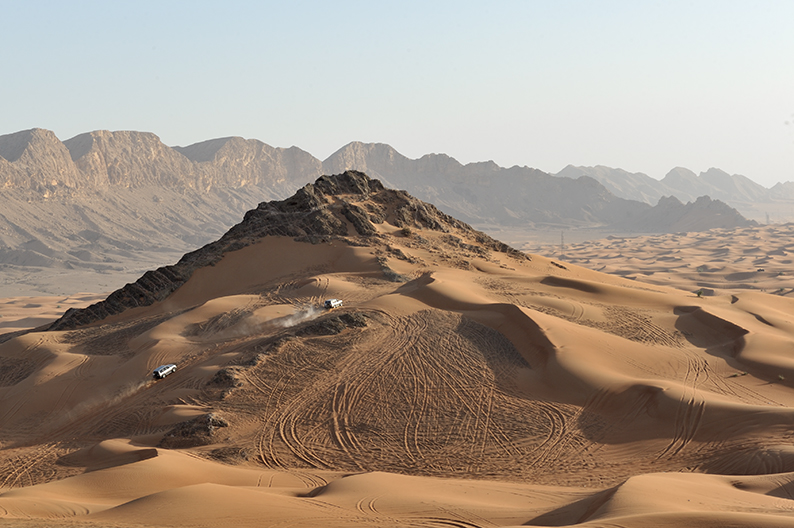
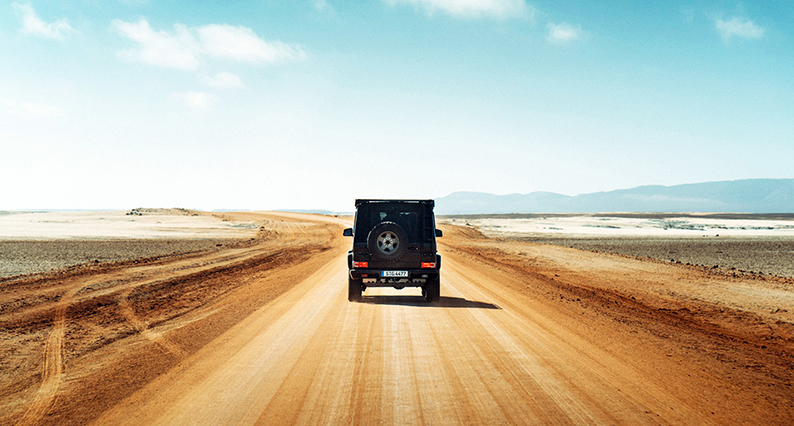
Desert Driving.
This is the real subject.
Understand the formations of dunes.
In order to navigate your way in the desert, you need to read and understand the dunes. Dunes are like waves. They are soft angled on one side, sharply breaking on the opposite side. Being the result of winds, they follow a trajectory, lining up one after the others, creating lanes, or “valleys” between them.
Driving along those valleys is easy. Going perpendicular is when things get tricky. You not only need to find the right “pass” to the next “valley”, but anticipate the next one as well. You must always be one “shot” ahead. Why ? What if the dune you just past leads to nowhere, and you can’t climb back up to where you came from to look for a better way ? You’re stuck in a bowl and that’s not a good place to be !!
Getting to the top for a better view
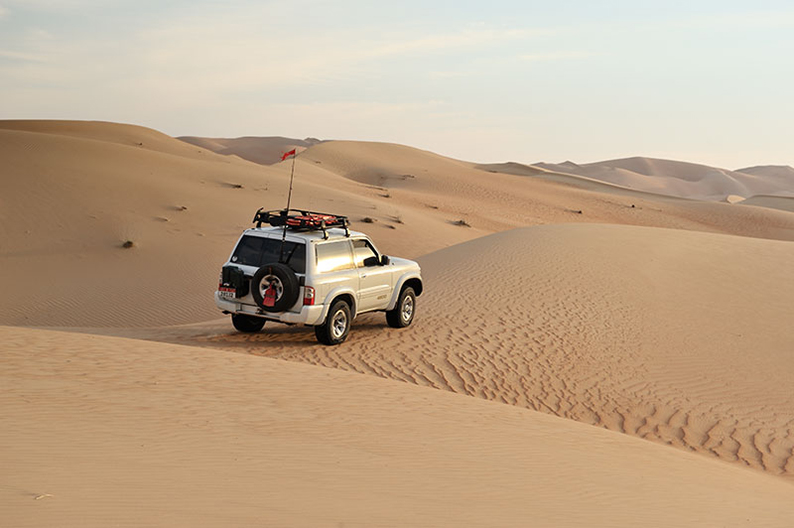
The only way to find out what lays ahead, is to reach to top of a dune and look for what is on the other side. To do that with your car you need to drive straight up towards the top of the dune, then as the dune’s top flattens before breaking back down, turn your car to sit parallel to the edge, the driver’s side facing down the sharper side. You now have a clear view to what is ahead. Not only the look of the dune you want to cross, but also the one after. There, you must take the decision to cross over and repeat the same maneuver on the next dune, or find a better way further along.
Climbing higher dunes
Getting to the top of a small dune from its soft side is easy. Getting to the top of a very large dune is harder. You need to keep the momentum all the way to the top, and that is easier said than done. Once your momentum is lost, you’re stuck, and must return down to try again.
What comes at play here ?
Remember weight ? All that equipment you installed on your rig against my advise… Well, you need to carry it up with you now. The lighter you are the easier to get up. (just a reminder !)
Know your car.
A Toyota Land Cruiser V8 petrol with automatic transmission is not driven in sand the same as A Jeep Wrangler 2.8 CRD manual.
With the Toyota, you need to aim and shoot ! That means find your lane, get your engine rpm cranking to near its max (5.000 / 6.000 in this case) and go without much more thought into it, hoping it will climb up. (it will!!)
With a diesel engine manual transmission Jeep, you must stay between your max torque range (2.000 to 3.200 rpm) and plan carefully when you will shift gears to remain there. You can also play within that torque range, going back and forth. It’s like giving it a small break to push again harder. More complex, but more efficient with less gas used!
Every car is different and dictates your driving technique.
Other tips
Jerk your steering wheel every once in a while during the climb. Turning slightly your wheels as you climb helps your tires “grab” more traction.
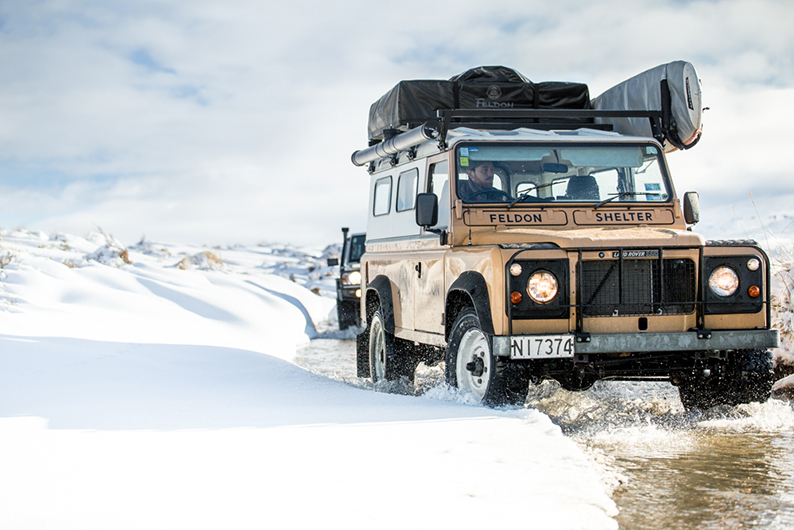
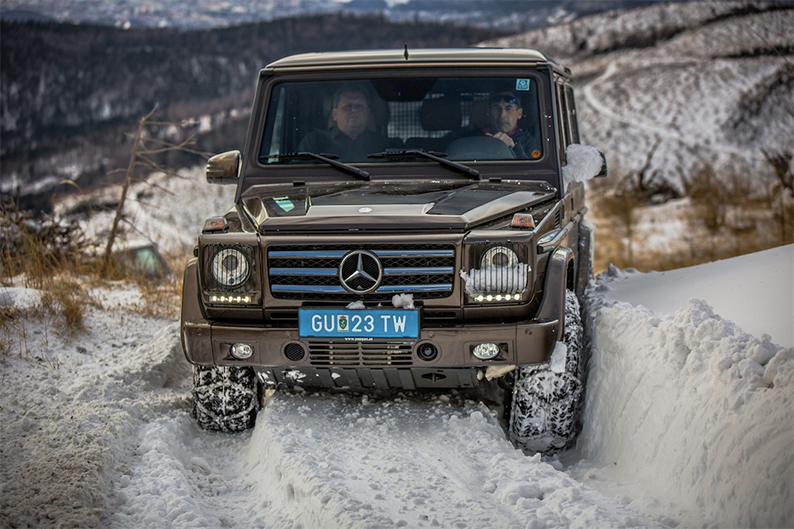
Snow.
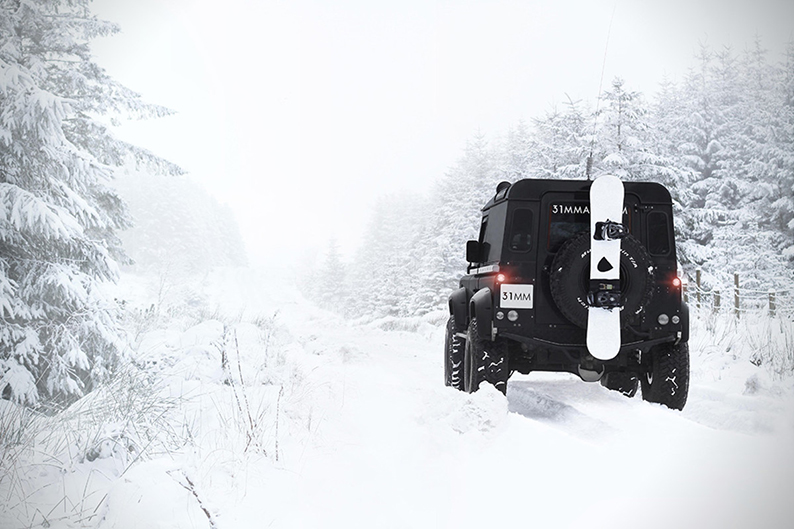
Let’s not talk about deep snow. Just snow covered trails. If you can’t even see the limits of your trail under deep fresh snow, don’t go ! Otherwise it turns into a giant water crossing, where you’ll have to check on foot every thing that lays ahead of both wheels. Snow means cold, you don’t want to spend most of your day outside checking if your car can follow. Makes no sense.
What are the main issues with snow driving ? Preparing your car for snow, breaking, cornering, grip on steep ascent and descent, temperatures impact on your engine. Let’s look at those in more details.
Tires.
There are what we call winter tires. But your all-terrain tires are more than enough.
As with every other loose surface, you must lower your tire pressure for a better traction. 20-25 psi is a safe bet, but you can go even lower to 15 psi if you feel necessary, like when climbing a steep ascent or descent. You can also add on snow chains to your tires for better grip. Between lower tire pressure and snow chains there isn’t much you can’t conquer.
Range selection.
As soon as you get on snow or other icy conditions, engage in High range. Only use Low when confronted with steep ascent and descent, or if on a very slippery surface.
Prepare your car for snow.
Make sure to wipe out the snow sitting on you roof and hood. You do not want any of it sliding off on your windshield or the ground in front of you while breaking. Once you have prepared your car accordingly, and are about to get back inside, make sure to wipe off the snow from under your feet. It’s never good to be dealing with icy wet pedals.
Engine & car damages.
Take your time to warm up correctly your engine before pushing it. (It goes without saying you have the right oil range for the conditions you are in)
The authorities first reflex when it snows is to put salt on it to make it melt. It’s not only very bad for the environment, it’s also very bad for your car. Make sure to rinse off the salt from your car after driving through snow areas to avoid rust and other un-welcomed side effects.
Driving techniques.
Breaking.
Driving straight on snow covered roads with all-terrain tires is no issue at all. The threads of those tires offer enough traction for you to feel as if you were under normal conditions.
The problem is to safely stop. The distances required for breaking and stopping in snow are far longer than when on solid ground. Having to suddenly stop and slam on the brake pedal to do so is a sure way to slide off in disaster mode.
To avoid putting yourself in that position you must refrain from speeding in the first place. Always think of the stopping distance required for the speed you’re traveling at based on the conditions of the surface you’re on. ANTICIPATE.
To safely brake, gently apply pressure of the brake pedal at first, and push on progressively. Unlike when driving in the sand, where it’s a good idea to disconnect the ESP or other wheel traction control system, here you must keep it on, as it will help you control against potential wheels sliding.
Cornering
Cornering is the second trick on snow, and even more on ice. To avoid icy situations it is always best to put your wheels on fresh snow. Previous tire marks on the ground can be frosted and offer even less grip. The idea here is the same as with stopping. Be smooth ! Don’t take sharp and abrupt turns. Instead, turn gently your steering wheel for wider cornering. Your speed is also crucial. The faster you go, the more your tires will fight against the original trajectory of your momentum… And loose, resulting in unsafe sliding. Keep it slow, keep it gentle.
An up-hill battle.
It’s all about momentum. Just like for every other climb. Gather enough speed at the bottom, get in four-wheel drive High, or low if really the climb if unusually steep. Engage in the highest reasonable gear to avoid wheels spinning and climb straight on. Taking a turn during a steep ascent without the required momentum is a good way to slide off towards the bottom. A trick here is to play in a very subtle way with the steering wheel, hinting back and forth, left and right, to look for extra grip, just like we advised you to do in sand. Now this has to be extremely subtle to be efficient. Too much and you’d loose some of that precious momentum.
If you can’t make it through and stop somewhere along the climb, no point fighting for more ground, you won’t make it. As a matter of fact, you might already be sliding back down as you start considering the options you don’t have. No panic, have a foot on the break, one on the clutch, and start again if you stalled. Engage in Low range if not already, put in reverse, get your foot off the break and clutch (if manual) and let the engine and gear do the breaking for you as you move backwards towards the bottom. Once safely at the bottom, rethink your gear selection and the required distance for proper momentum and try again.
Downhill.
When faced with a steep snowy down-hill, you always worry about your car’s weight. (Again, we did warn you in previous posts about weight being your enemy !) Will my own weight loose its battle against gravity ? Will I start sliding off without control ?
To avoid this unsafe situation, engage in Low range, first gear, release the clutch and stay away from it. You can here and there ever so gently caress your brake pedal, but the best practice is to avoid it.
If the car starts to slide, you must accelerate smoothly, so your engine and wheels ultimately catch up with your actual speed and retake control of the situation.
Mud.

Before being an off-roader, I’m a mountain biker. Before being a mountain biker, I’m a pedestrian enjoying trekking in nature as much as I can. And in both cases there is nothing that pisses me off more, that trails destroyed by motorized retards during the winter months !! Driving through wet muddy trails with a truck, a quad, or a bike is a sure way to dig trenches that will fill up with water, and ultimately transforms a beautiful country trail into a wasted disaster. It only takes one pass to alter considerably a trail. If the trail already looks like an African trail during rainy season, be smart don’t go ! Respect others, respect yourself, respect the environment, respect your car and avoid mud terrain as much as you can. There is always a better way to go !
Now, that being said, I’ll still tell you how to drive responsibly if you really have to drive through mud terrain.
Tires.
There are mud tires on the market. They are very good. However, they are very loud on tarmac and effect your gas mileage. Again the all-terrain range is enough to get you through just fine.
Your tires again should be deflated. 20 psi on average as a starter, 16 to 18 psi if the mud is really wet. Just be careful with punctures. Mud is often mixed with rocks and other debris.
Range selection.
Engage in High range and select your gear accordingly before entering a wetter zone. Your Low range is there when stuck or during steep ascents and descents.
Driving techniques.

When on a trail, stick to the middle. You might think you can avoid the worst by passing on the side, but you’re only expending the mud further out, before ultimately sliding back to the middle, or worst off the trail. This is because the edges are softer and often at an angle because of the repeating “digging” in the middle.
Control your speed at all time. Keep a steady foot on the throttle for momentum’s sake, and avoid speed changes to keep your tire’s rotation even. Like with all other loose ground areas, the faster your wheels spin, the less you generate traction, the more you’ll dig yourself into a hole. Try to place your tire on other tire marks if you can, chances are the ground underneath it has been pressed enough and is now more stable than otherwise untouched mud.
If you start to slide, simply play with your steering wheel to correct your angle. Do not accelerate or slow down, just adjust your wheel back and forth gently.
Last, mud projects all over the engine bay, and can after a while obstruct certain areas, like the radiator for example. It is very important for your radiator fins to be clear for the outside air flow to cool your engine. Make sure to check and clean your engine bay (and pretty much everything else) after having driven in mud.
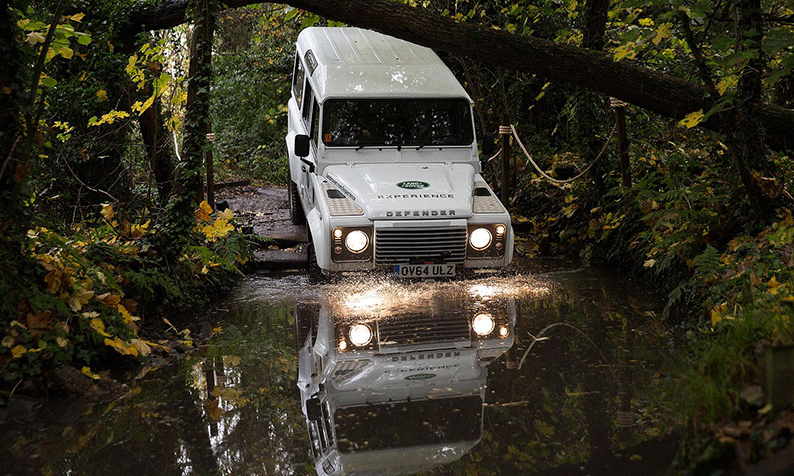
Water crossing.
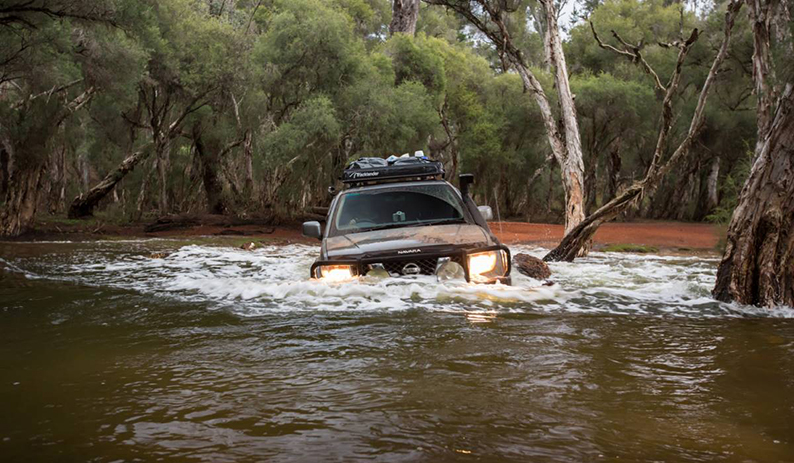
It’s kinda fun, makes for great videos on social media, but if not done right, can lead to serious troubles fast.
Now we are not talking about narrow and shallow streams of clear water you can easily assess with a simple & quick look. Here we are talking about those wide and deep enough to make you second guess your itinerary choices.
Like for every other obstacle, you need to understand the type of difficulty you are faced with. Where can you enter ? Where can you exit ? How strong is the current ? How deep is the water between those two points ? How stable is the ground between those two points ? Are there any additional obstacles underneath the surface you need to consider ? What do you need to do to protect your engine from the water damage ?
Only once you have positively answered all those questions can you proceed with the crossing.
Where can you enter ?
If you are following a trail, (and for obvious reasons you should) you can assume it leads you to the best crossing spot available. If not the trail would have directed you to the better option. As such you will see tire marks entering the water, continuing the trail through. This is your best point of entry. Just make sure to clear any debris that may have been recently left by running water.
Where can you exit ?
If you look on the other side of the water you will see tire tracks leading away. This is your point of exit. Now if you are dealing with a river subject to strong current, you should see at least two exit points. One downstream from you and one upstream. The one upstream is not a valid exit point. It actually is a point of entry for people coming from the opposite side. The reason being you do not want to cross against the flow of the current. As such you always aim for a point downstream from where you enter.
Again look at the condition of your potential exit. Is it clear or has been been recently obstructed by new debris you won’t be able to move away? In which case you might seek a new exit point.
How strong is the current ?
That should be obvious. Now you might notice that current isn’t even all around. Areas may be very quite, while other parts may be much stronger. It is often a first indication of depths underneath the water. Water runs down faster when it has more room to flow. So where you see water running down faster, it’s most likely deeper. It’s not systematic, but is a good first assessment. In the end just stay away from the strong currents and adapt your lane accordingly.
How deep is the water between entry & exit points ?
There is only one efficient way to survey the conditions of the lane you intend to take to cross a river. That is walking through it on foot. If you can’t walk it, you can’t cross it.
(That also apply if the temperatures are too low for you to safely enter the water. You might not want to get through with your car and take the chance to get stuck in the middle. How will you get back to shore then ?)
Strip to the bare minimum, but keep some shoes on, and get in. You need to walk all the way across and look for major level differences along the way. The idea is obviously to find a pretty leveled lane, clear of sudden big drops.
How stable is the ground between entry & exit points?
What are you stepping on ? Mud your feet struggle to get out of ? Loose gravels ? Or is it pretty stable ?
Obviously the more stable, the better, and you should look around to find the best option. Now loose gravels are pretty common and not too big of a deal. Sticky mud is a bigger problem and should be avoided as much as possible.
Are there any submersed obstacles ?
While walking across, look for obstacles, like boulders or large submersed logs. A wooden stick to help you survey is a good idea if the water is too murky. Once spotted, try to see if you can move it away. If not, look for another way.
What do you need to protect your vehicle from water damage ?
Water is not a friend when it comes to your engine. The most important factor for any car, whether diesel or petrol, is the location of your air intake. If it happens to be located below the water level during the crossing, the engine will suck in water instead of air. You will not only stall, but also damage your engine. You must know your maximum height allowance and choose a path accordingly. A great way to avoid the issue is to install a snorkel on your vehicle.
The other issue, one that only concerns petrol engines, is the effect of water on ignition and spark plugs. It’s always a good idea to protect those with at least water repellant before entering the water.
Driving across.
Now that you have answered all of the above questions and put your clothes back on, it is time to cross.
You should have your tire pressure down to 25 psi if not already, engage in low range, put your self in first or second gear. The choice of the gear is important because you want to avoid having to change gears in the middle and interrupt your flow. Loose gravels at the bottom and you’re better off in second to have enough speed to avoid any stuck. A harder surface with various rocks along the way and you should stick to first. Enter the water, use the current as an ally, and let your speed create a bow wave in front of the car. Keeping the speed steady maintains that wave which helps.
Once on the other side, stop for a moment to let the water flow out of your car. Also press on the brakes a couple time to dry them up.
I could go on and detailed more complex crossing in groups involving safety winching measures, but this is a beginners guide.
Rocks & Boulders.
Where & when ?
You can find them anywhere, but you’re most likely going to be confronted with rocks and boulders on seldom used mountain trails. They can also “pop-up” in the middle of the way after heavy rain fall, “tagging” along as the water runs down the track on its way to the valley. In mountain areas, the unpleasant situation is often multiplied by the percentage of the slope you are on, and the abrupt drop right on the edge of your narrow track !
This is where the first part of the sentence “As slow as necessary, as fast as possible” applies. When confronted with uneven rocky grounds, you must at least slow down if not come to a complete halt, and carefully consider where to put your wheels. Why ? Rocks protrude and put everything exposed underneath your car at risk. Check if you have high enough clearance to pass without touching or not ?
Passing around.
A first solution is to see if you can go around the obstacle and avoid it all together without putting yourself at greater risks. As described above, there is only often so much room for you to maneuver on a mountain trail before you put your wheels over the edge. It’s always best to have someone standing in front of you to double check and guide you through.
Passing over.
If you can’t go around, you need to pass over it. First check if you have enough ground clearance underneath your car. Either all the way, or partially. Partially means the lowest part of your vehicle won’t pass while the rest will. A classic case is when all is good except the transfer case or the axle differentials. In such cases you need to plan your lane accordingly, and position your car so the lowest point passes far away from the highest point of the rock. Again, someone standing in front of the car with a clear view of the obstacle to guide you is a plus. If alone, it can take a lot of in & out of the car to assess the situation as you progress through.
A second passing over solution is to build a ramp before and after the obstacle. With your Maxtrax, other loose rocks, or sturdy materials you can find around you, make sure the angle is soft enough and the ramp long enough on both sides to avoid touching underneath once the first wheel has passed, and the obstacle sits in between the two.
Moving them
The last solution if the first two failed, is to try to move the rock in question. Now obviously it has to be loose. And even as such, if it is big enough to block you, it will be heavy enough to cause you trouble moving it. That’s where a crow bar can come handy, or again, a winch. Tie up a rope safely around the rock, attach it to your winch cable and start pulling it out of your way.
Trenches & Ravines.
I like to make a semantic difference between the two, but the passing technique is pretty much the same for both. A ravine to me is made by water running down a mountain track, while a trench is made man and can happen annoyingly anywhere. In both cases there can be Parallel or more or less perpendicular.
Parallel trenches
A good example of parallel trenches are found on country side trails, where heavy agricultural vehicles have carved deep trenches under their large tires, leaving high grassy flats in between. What is no issue for them due to their ground clearance can become a problem for standard 4×4. Driving in their respective tracks on each side of the raised middle section, is a sure way to scratch your differentials along the way. The simplest way to avoid it is to drive one wheel on the central elevated surface, the other in one of the trenches, as long as you’re not too close to a tipping point ! Choose your side based on where is located your most exposed components.
Parallel ravines
Parallel ravine(s) are created on soft ground mountain trails by rain water on their way down. The heavier the rain, the steeper the mountain slope and the deeper the ravine can be. You’ll usually find a main one and its smaller “affluents”. They key concept here is the same as the one explained in the previous paragraph. Avoid putting both opposite wheels, left and right, in separate ravines, lowering your car under-belly too close to the ground in between and the various debris sitting there. Always place one side on higher ground.
Perpendicular trenches & ravines
Perpendicular trenches and ravines cannot be overcome so easily. In the best case scenario, you can drive through by “attacking” it side ways. This means taking aim at a 45° degree angle, putting one wheel at a time, and not two wheels straight on.
If too large or too deep, you’ll have to build a bridge. Either with your Maxtrax, or by “simply” feeling it with rocks and other loose material you can find around. Now, once you have passed the trench, it is very important for you to clear it again. Those trenches often have a purpose and shouldn’t be left obstructed. Just leave what you used to fill it near by for the next person trying to pass to use it, and move on till the next obstacle.
Conclusion
I have tried through those past articles to give a very brief account of the various situations you might find yourselves in while off-roading, and how to prepare yourselves for it. Is it enough ? Hell no ! Just the very beginning of a never ending path.
To share with you my personal experience, I first learned sitting next to an experienced driver until I bought my own truck. I then followed him along easy trails in Baja California. At the same time I signed up for a class at a mechanical school in San Diego, CA. to learn how to fix my car if needed. I then joined an off-roader club to learn from others. Later on, having relocated to the UAE, I took an official off-road class at a driving school in Dubai to become a certified off-road guide, so I could go out in the desert on my own. And still today, besides all those years, I can safely say, there is a lot I still don’t know.
Keep learning, keep playing, keep exploring.
Nice guide. You got a good point of views, lots of ideas and information regarding off road driving skills. Thanks for the great share.